
Intro
This post is intended to show one technique that can be used in an attempt to unpack a sample that is suspected to be packed by either a known packer or something unknown or even custom.
There are many techniques that can be used and malware may dictate what works and what does not work. I found that this technique seems to be an easy first pass for any given packer as a first step (outside of having the packer/unpacker tool to properly unpack). The intent here is to show a way to do it when that is not feasible.
The malware sample used in this blog post
- MD5 hash:
5B47FBC2DA1868022F30317EC7DDA39F - VirusTotal link to sample: https://www.virustotal.com/gui/file/1bb8c898b249c47249c31d9901b12add9d307f027e5cbff97937769d7e5c732e/detection
In brief: what is a packer?
The term “packer” has changed over the years and can be used to mean many different things now. The three main categories of tools in this area are called packers, crypters, and protectors.
For the purpose of this post I am refering to packer to be described as:
A tool that compresses, encrypts, and/or modifies the bytes of a file to effectively obfuscate it and make it harder to statically analyze and reverse engineer.
A few of the popular packers for malware are: UPX, ASPack, Themida, Exe Packer, MPRESS, Morphine, and others.
How to know a malicious binary is packed?
There are a few key indicators that you can use to make this determination pretty quickly: section names and sections being executable when they shouldn’t be, high entropy values and a mostly missing Import Table, odd entry points, to name a few.
Section Names
Most packers will create their own section names within the binary. In the case of UPX (used in this sample) you will see PE section names of UPX0 and UPX1. For MPRESS you may see .MPRESS1 and .MPRESS2. For VMProtect it creates sections named .vmp0, .vmp1 and .vmp2.
You can perform a quick Internet search on the section names to help identify what it may be associated to as most are well-known.
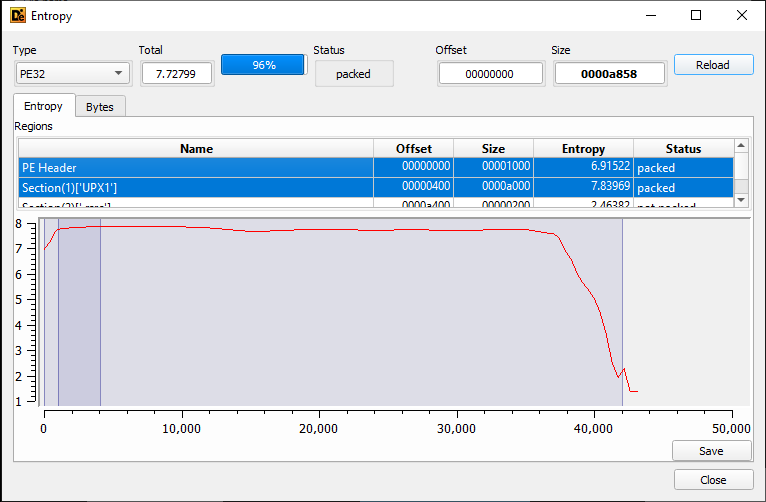
Entropy Values
The entopy of a file is essentially an indicator of the randomness of the characters in the file. When a file has been compressed or encrypted it will have a high value of 7 or 8. Conversely, if it appears to be plaintext it will have a low entropy value.
Using the Detect It Easy tool you can see the entropy of the UPX0 and UPX1 sections within the malware sample:
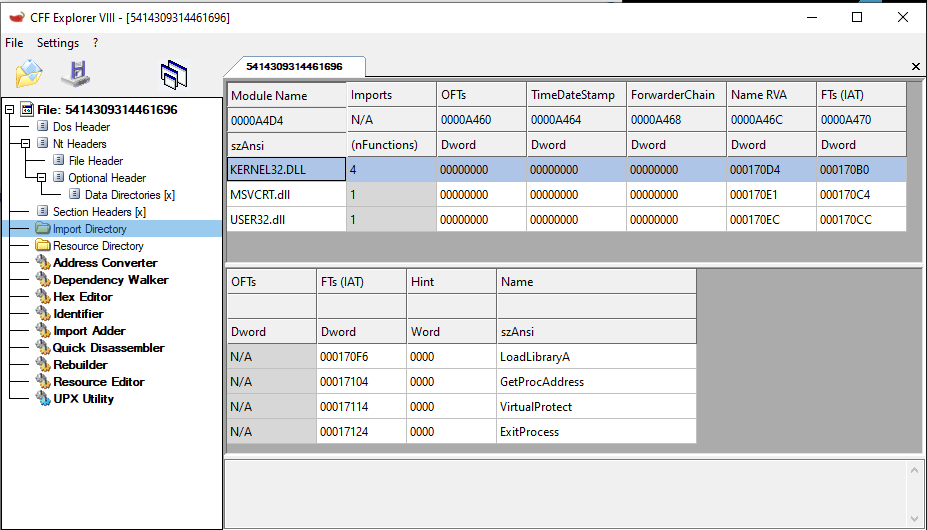
Import Table
The Import Table of the file may look as though very few functions are being imported and used. This may simply be due to the packed file hiding most of the functions and only leaving behind what is needed during the unpacking process.
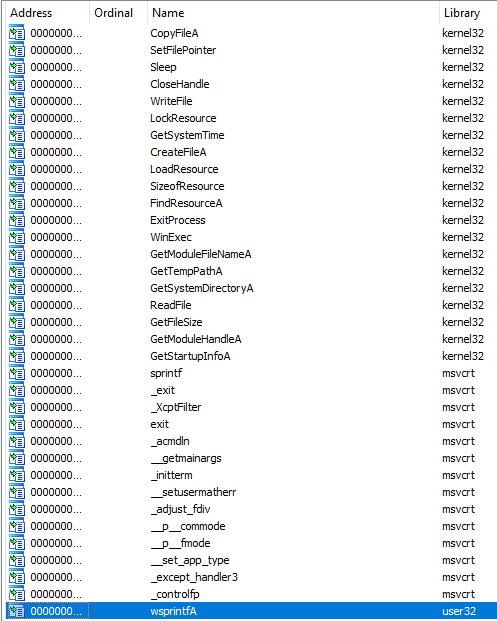
Additionally, some key indicators of left over functions that are very commonly used during unpacking or resolving obfuscated functions are: VirtualProtect, GetProcAddress, and LoadLibraryA. And sure enough, when we look at the sample in the CFF Explorer tool…
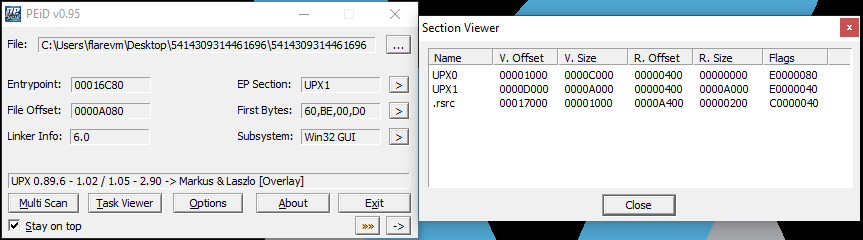
Tools that do it for you
Lastly, there are many tools that will go through and check these sorts of indicator and present you with their findings. The most popular tool is probably the PEiD tool which clearly shows our binary as UPX packed as seen below:
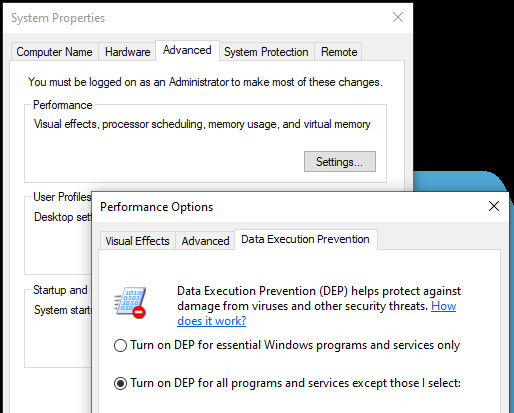
Preparing Windows to adhere to DEP protection
By default, Windows 10 only turns on Data Execution Prevention (DEP) for “essential Windows programs and services only”. You need to change this to be “all programs and services” so that Windows will prevent the malware from executing code in sections that are not marked Executable.
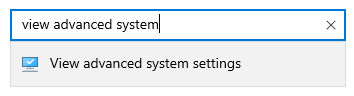
- In the Windows Control Panel, search for “view advanced system settings”
![]()
- Select the Advanced tab
- Click Performance->Settings
- Select the Data Execution Prevention tab
- Select the radial option to enable DEP for all applications
![]()
- Reboot your VM for the setting to take affect
Manual Unpacking Steps
Opening malware sample in Immunity Debugger
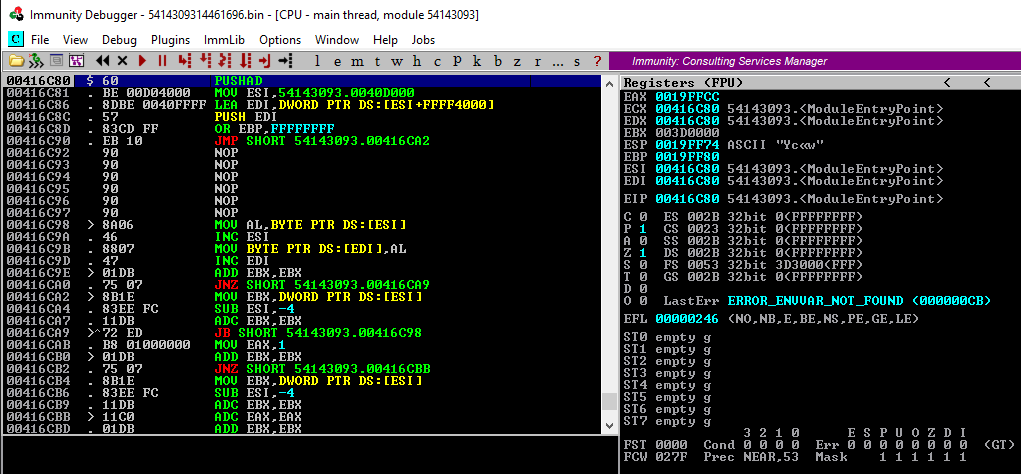
- Open Immunity Debugger and hit
F3to open a dialog to select the malware file to open - The file will load and break at what it believes to be the Module Entry Point (this is the beginning of the unpacker code in this case)
![]()
Observe the UPX sections
- Press
ALT+Mto identify theUPX0andUPX1sections. Note that both of these sections have access levelRWE(Read/Write/Execute)
![]()
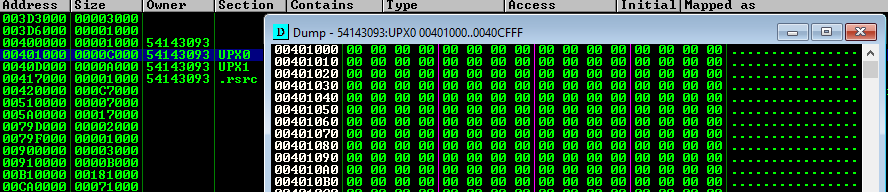
- If you double-click on the
UPX0section a dump window will show that the section is simply a placeholder for the decoded bytes
![]()
- If you double-click the
UPX1section you will see the UPX unpacking routine that will write the decoded bytes into theUPX0section
![]()


Remove Execute permission from the UPX0 section
Before we attempt to let the malware unpack itself we need to setup a way for it to stop execution upon finishing its unpacking routine. To do this we will set the UPX0 section that it is writing bytes to, to RW as opposed to RWE. This should cause an Access Violation once it attempts to pass control to the newly unpacked code.
- Change the
UPX0section toRW
![]()
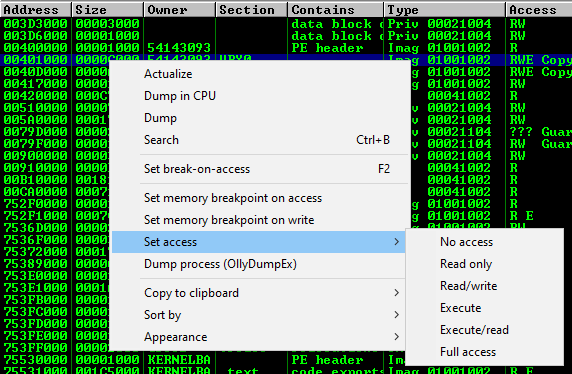
The updated permissions should look like the following now:

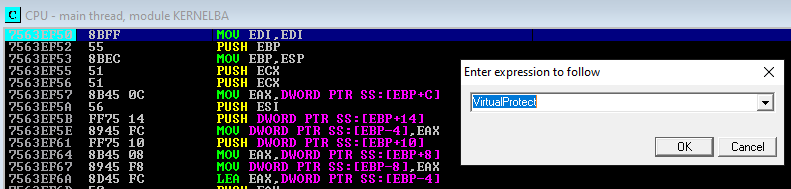
Catching VirtualProtect calls
Malware will also attempt to update the permissions on its own so we need to setup breakpoints for that scenario as well. If we do not catch this, the malware may update the section back to RWE and continue running.
- Press
CTRL+Gto enter an expression and type inVirtualProtectand set a breakpoint here viaF2
![]()
Execute malware until access violation
- To continue running the malware in the debugger press
F9
In this case we’ll see VirtualProtect being hit and specifically for the address 00400000 which is the “PE header” section that it is changing from R to RW (and a second call later to revert it back to R)

The third time we hit F9 we will get an Access Violation as it attempts to pass control to the UPX0 section and begin executing code (the landing point address should be our true OEP). The violation occurred since we manually set the section to not be able to execute and this is being enforced by DEP.

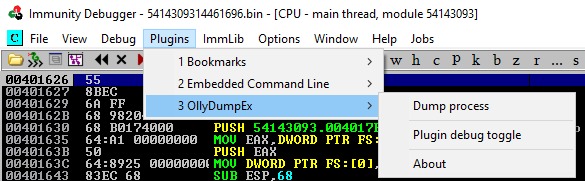
Dumping memory to file via OllyDumpEx plugin
NOTE: If you don’t have the plugin you can download it from OllyDumpEx.
At this point, the UPX decoding is complete and we can dump memory to disk. Upon dumping memory to disk the Import Table will still be broken and we’ll need to fix this via an import table recovery tool.
- Use Plugins->OllyDumpEx->Dump process to save memory to disk
![]()
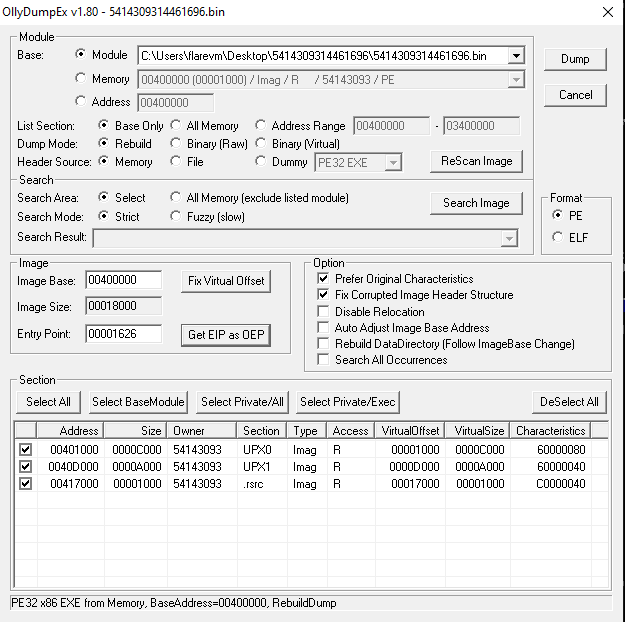
- Click “Get EIP as OEP” and then click “Dump” to save to a file
![]()
NOTE: Do not close Immunity Debugger! Leave it running as it is still needed by the ImportRec tool to patch the file in the next step
Fix Import Table via ImportRec
Import REConstructor is a tool that can scan the running binary in your debugger for all calls to system functions and reconstruct the import table as a patch to the dumped file. In this process it will also create a new section in the file called .mackt
Open Import REConstructor and attach to the active malware binary process that is still running in Immunity Debugger and then click “Get Imports”
![]()
Finally, click “Fix Dump” and select the dumped file on disk as a result of using the OllyDumpEx plugin.
![]()

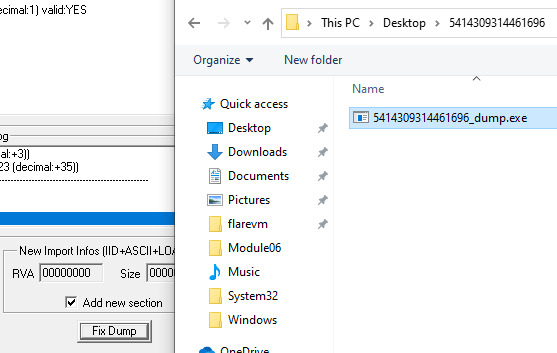
At this point, the Import Table should be patched and ready for additional analysis.
Functions back in the import table
When the resulting binary is now pulled into IDA you’ll see quite a few more system functions show up from the newly patched Import Table.
Additional notes
You will find a new section created called .mackt. This is created by the Import REconstructor tool as part of the patching of the Import Table. This section needs to stay here as if you try to delete it, the Import Table will also disappear along with it.
As for the UPX1 section where the original packed code is, that can be deleted completly from CFF Explorer -> Delete Section (Header and Data) without impact. This may not be the case for every sample though.
While you get recovery of all the code needed to continue analysis, you will not get full recovery of the names of the original sections (.text, .rdata, .data, .rsrc) as you would with the original packer tool performing the reversal. However, this does not stop further analysis in any way.
Conclusion
This is one of several methods to unpack a packed binary to continue analysis. This method should work for many pieces of malware but as they get more complicated this would be one step of many (multiple encodings, further encryption, other anti-analysis and debugging tricks that need to be addressed along the way and more).
Continue reading with Manually Unpacking Malware (part 2)